尝试 Spring Native,将一个 SpringBoot3 项目编译为二进制文件,提升程序启动速度
相关链接:
使用版本:
GraalVM: graalvm-jdk-17.0.8+9.1
spring-boot: 3.1.4
native-maven-plugin: 0.9.27
注意:此文章于 2023-10-19 完成,可能已经过时
Native Image 的优缺点
优点:
- 程序启动时间段
- 运行时使用内存少
- 运行环境不需要安装 jvm
缺点:
- 编译时间长
- 部分依赖不支持(或需要进行特殊配置)
- 需要生成提示文件来支持反射等功能
- 生成的二进制文件较大
GraalVM
在下载页面,选择对应的 Java 版本和平台,下载对应的 GraalVM(这里以 Java 17 与 Windows 平台为例)
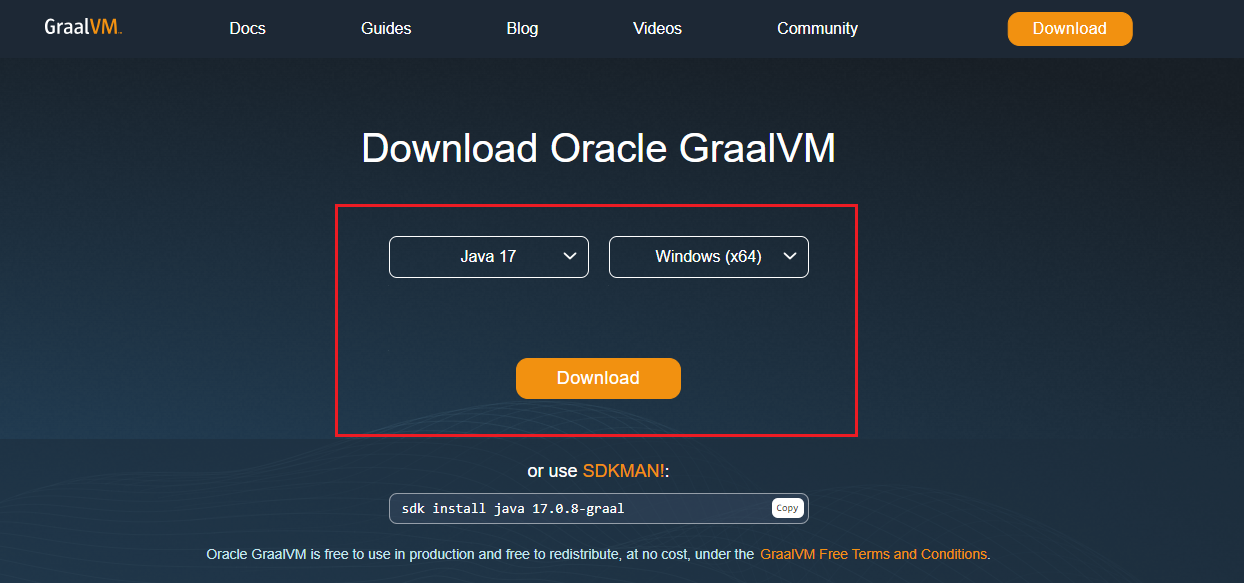
下载后,自行解压、配置环境变量JAVA_HOME,将$JAVA_HOME/bin加到PATH中
项目
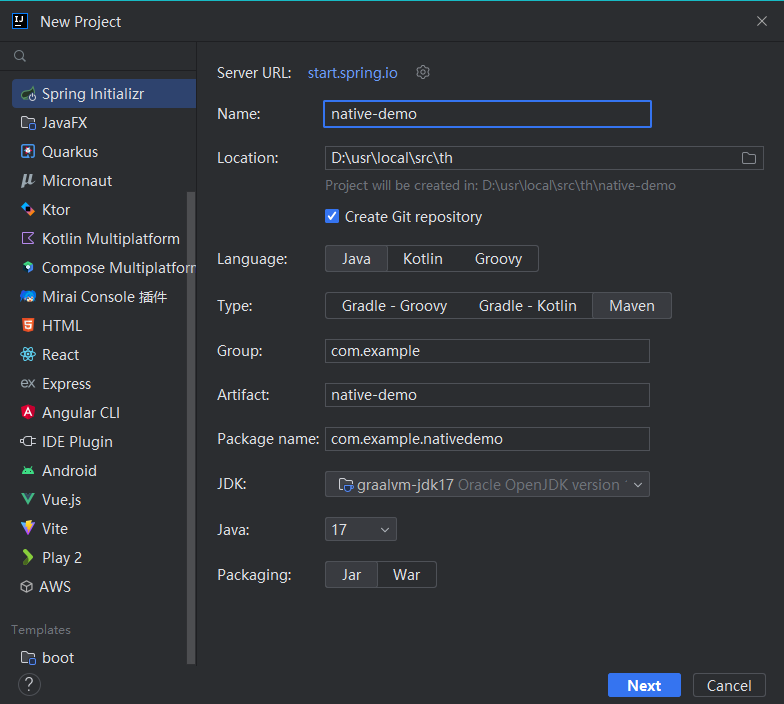
创建项目
选择 JDK 为 graalvm
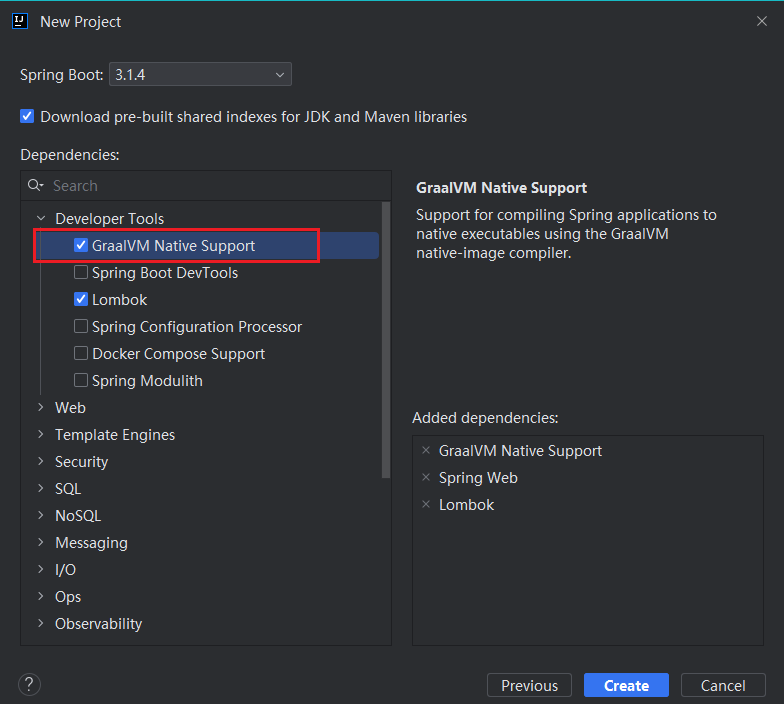
选择 GraalVM Native Support,创建项目(会添加native-maven-plugin到pom.xml)
这里我额外选择了 Spring Web 和 Lombok,来写一个接口用于测试
编写代码(用于测试)
修改 NativeDemoApplication,编写测试接口
| |
直接运行程序后,请求接口正常,接下来将项目编译为二进制文件
编译环境
Linux
以 Debian 为例,执行下面的命令安装所需的包(一般服务器中都有),其他发行版可参考文档
| |
Windows
在 Windows 上进行编译,需要额外安装 Visual Studio(至少 Visual Studio 2022),并配置相关环境变量,详细操作可参考 Using GraalVM and Native Image on Windows
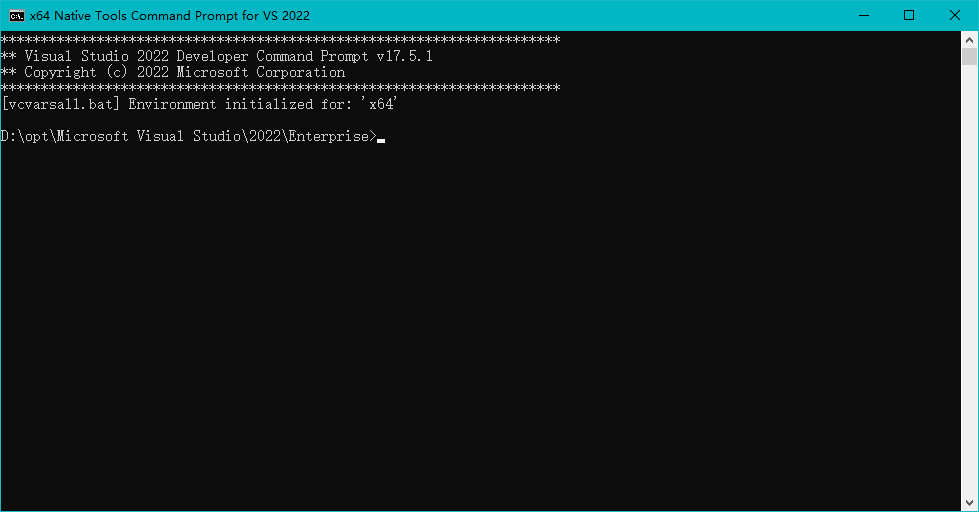
另外需在 VS 附带的x64 Native Tools Command Prompt for VS 2022窗口中执行编译命令(貌似是因为编译命令过长,在 powershell 或 cmd 中执行会出现问题)
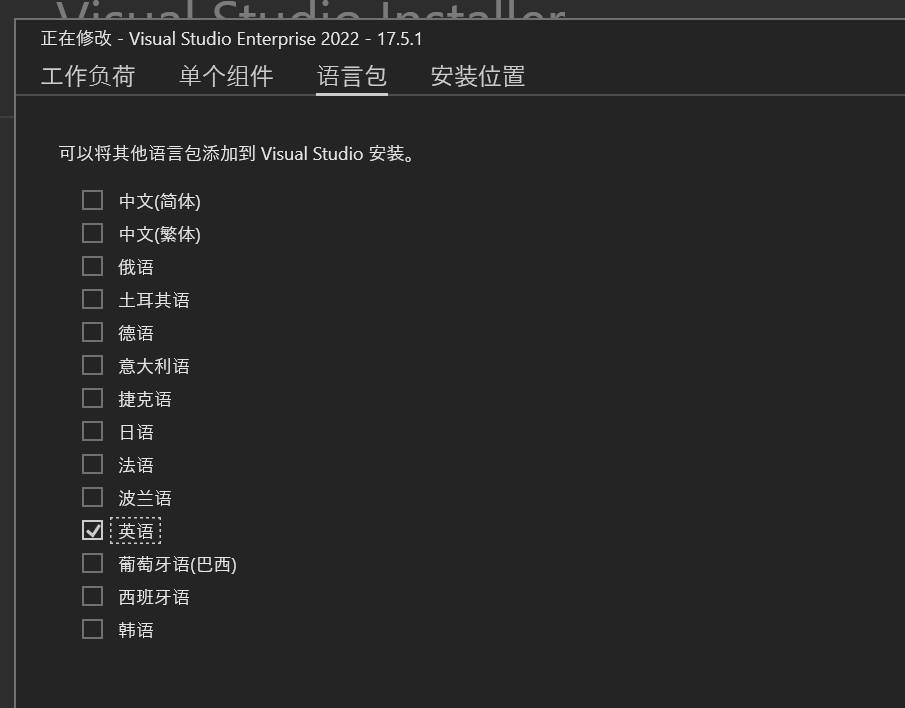
Visual Studio
自行从官网下载安装,安装时注意,语言包只勾选英语,否则会导致编译时检查环境出错
接下来配置环境变量,以下配置以 VS 安装在D:\opt为例,需替换为自己 VS 安装路径,注意版本号可能不同
Path
添加下列内容
1D:\opt\Microsoft Visual Studio\2022\Enterprise\VC\Tools\MSVC\14.35.32215\bin\Hostx64\x64INCLUDE
新增此环境变量,内容如下
1
2
3
4
5
D:\opt\Microsoft Visual Studio\2022\Enterprise\VC\Tools\MSVC\14.35.32215\include D:\Windows Kits\10\Include\10.0.22000.0\shared D:\Windows Kits\10\Include\10.0.22000.0\ucrt D:\Windows Kits\10\Include\10.0.22000.0\um D:\Windows Kits\10\Include\10.0.22000.0\winrtLIB
新增此环境变量,内容如下
1
2
3
D:\opt\Microsoft Visual Studio\2022\Enterprise\VC\Tools\MSVC\14.35.32215\lib\x64 D:\Windows Kits\10\Lib\10.0.22000.0\um\x64 D:\Windows Kits\10\Lib\10.0.22000.0\ucrt\x64
命令行窗口
执行编译命令,需在x64 Native Tools Command Prompt for VS 2022窗口中进行(可通过Win+S搜索打开)
编译
编译耗时较长,同时需要较高内存,建议在性能好的机器上进行
cd 到项目目录中,执行下面的命令进行编译,会由 GraalVM 的 Maven 插件org.graalvm.buildtools.native-maven-plugin来执行若干处理,并调用native-image进行编译
| |
等待编译完成,在生成的 target 目录下,可以找到native-demo.exe(Windows)或native-demo(Linux)可执行文件
执行可执行文件后,请求测试接口,功能正常
编译参数
可在pom.xml中追加native-image编译时的参数,如:
| |
--enable-url-protocols=http允许程序使用
http协议的 URL--features=xxx.xxx.LambdaRegistrationFeature-H:+AllowDeprecatedBuilderClassesOnImageClasspath-H:DeadlockWatchdogInterval=10-H:-DeadlockWatchdogExitOnTimeout根据报错提示加入
-H:+AddAllCharsets添加对所有字符集的支持
-H:IncludeResourceBundles=javax.xml.bind.helpers.Messages包含
javax.xml.bind.helpers.Messages资源包
依赖问题
mybatis-plus
参考 mybatis-native-demo 项目
pom.xml中需添加graal-sdk依赖,版本号与之前下载的 GraalVM 一致
| |
从 mybatis-native-demo 项目中复制 MyBatisNativeConfiguration 类,在其registerHints方法中添加下面的代码,将各mapper.xml文件注册进提示文件,其中mapper/**/*.xml是各mapper.xml文件的位置
| |
从 mybatis-native-demo 项目中复制下面的三个类
GraalReflectionAotHints注解,在使用了 mybatis-plus lambda 方法的类上标记AotUtils获取所有标记了GraalReflectionAotHints注解的类LambdaRegistrationFeature将AotUtils获取的所有类调用RuntimeSerialization::registerLambdaCapturingClass方法注册进去
使用GraalReflectionAotHints注解标记需要注册的类
给native-maven-plugin添加下面的 buildArg
| |
ShardingSphere-jdbc
修改配置文件的分表规则写法(native-image 不支持 Groovy):
| |
fastjson
使用类似于JSON.to(clazz, obj)的方法会产生报错org.graalvm.nativeimage.MissingReflectionRegistrationError
需要自行将对应的 clazz 添加到提示文件中,可以使用 custom hints 中提到的@RegisterReflectionForBinding注解,在任意位置(使用到对应 clazz 的方法/类,自己编写的配置类,XXXApplication 等都可以)添加该注解,在注解参数中填入需要注册的 clazz 即可,如:
| |
提示文件
部分涉及到反射的依赖或程序代码,可以通过生成提示文件的方法来解决
相关链接:
在src/main/resources/META-INF/native-image/目录下的提示文件会在编译时被使用,提示文件的类型和作用参考 Metadata Types
生成提示文件的方法主要有以下两种:
- 自定义提示
- Tracing Agent
自定义提示
Spring Native 在编译之前会对 jar 包进行 aot 处理,在META-INF/native-image/<group.id>/<artifact.id>目录生成提示文件
可以自定义一个实现RuntimeHintsRegistrar接口的类来注册需要加入提示文件的内容
RuntimeHints 类的写法如下,需要在 Bean 上使用@ImportRuntimeHints注解来导入:
| |
一般可以将 RuntimeHints 类的定义和导入写在一起,如:
| |
还可以直接使用@RegisterReflectionForBinding注解来绑定需要序列化和反序列化的类
此注解可以在任何 bean 的类或方法上使用,绑定参数中的类,使用方法如:
| |
或在一处绑定多个类:
| |
Tracing Agent
将项目打成 jar 包之后,使用 graalvm 执行下面的命令来运行程序
| |
当程序停止后,会在/path/output目录生成提示文件,将文件放到项目的src/main/resources/META-INF/native-image/目录下即可
提示文件中会记录本次运行中用到的反射、序列化与反序列化、资源文件等内容,所以在程序运行时需要尽可能完整地使用每一处功能逻辑
如果一次运行还不够的话,可以使用下面的命令来继续生成提示文件(会在已有的提示文件基础上,继续增加新的内容)
| |